Dec 27, 2011

Scarf Friends


I felt kind of guilty murdering some perfectly good stuffed animals for the sake of crafting but I got over it.  They turned out cute!  For my big girls I bought 2 scarves and 1 bear each from the Dollar Store.  I sewed the scarves together down the sides to make a tube, flipped it right side out, cut the bear in half, then stuffed the open in one of the ends of the scarf and hand sewed it shut.  I hand sewed it so I could make sure I got the stuffed animal closed so the stuffing wouldn't fall out and down into the scarf once the girls started wearing them.  I did the same for the rear end of the bear on the other end of the scarf.


This is one of the scarves folded up for gift-giving.


The kitty scarf is my favorite. This one is for a very tiny little girl so I only used 1 scarf but 2 stuffed kittens.  The bottom of the kitten wasn't that cute so I decided to make this scarf have 2 heads.  I just cut the 1 scarf in half and sewed the 2 halves together to make 1 tube scarf.  Then repeated the steps from above.


recycled sweater wreath ornaments


Made from old sweaters.  Cut sweaters into 1 inch squares, string together with embroidery floss, tie a ribbon for a hanger. done.


Create Yourself

Frame from recycle center painted yellow.  Scrapbook paper behind glass not big enough to cover whole area, so I centered in the middle then added more paper to the top of the glass that I ripped and burned.  The flower was made from scrapbook paper and a brad, I burned the edges of it too to match. It too is on outside of glass, to add dimension to project.  The saying is white vinyl cut out with my silhouette machine.


Dec 21, 2011

Magic Santa Key *FREE PRINTABLE*

My youngest daughter was worried this year because we don't have a chimney for Santa to enter the house through.  I told her I would leave a key out for him, but then she was worried a robber would use the key to enter our house.  So I said it would be a magic key that could only be used by Santa.  I have some old fashioned looking keys that used to hang on the wall for decoration.  I am going to take one of those and attach this label.  She will be able to hang it outside on Christmas Eve for Santa.

Just click on the image above and it will open as a larger file on your screen, save it to your desktop, print it out and follow directions on page.

Happy Holidays!

Nov 20, 2011

Retro Wall Art


The small pics around the "M" are ones my mom made years ago.  The M in the middle is made from a piece of wood wrapped with yarn, some burlap ribbon and some flowers that broke off of an old wreath.  The mirror is an old mirror I found at the recycle center for $1.  It was gold, I spray painted it a retro green color.  I like how they all turned out.


Book Page Wreath


I made this wreath with a foam green wreath form, small amount of ribbon, floral pins, and old book pages.
The library was selling books this summer for like a dime a piece.  I bought several but haven't decided what to do with them yet...until this.  I took some of the pages out of the book and cut some generic flower shapes.  Then I layered about 3 flowers rotating them so the petals didn't overlap.  I took a small strip of book page paper about 1/2 inch by 2 inches and centered it on the stack of flowers.  I then took the floral pin and stuck it down through the center and into the wreath.  The small straight strip was then wrinkled up to make the center of the flower.  You can kind of bend  up the edges of the petals to make them less flat looking and more realistic.  Then just keep that going all around the wreath.  I added a brown ribbon to hang the wreath with.  Also because my book pages were so old they were pretty fragile so I took some clear acrylic spray paint and sprayed the whole finished product to keep the pages from breaking off.  The only thing I would have done differently is to maybe mod podge some book pages to the wreath first before pinning on the flowers....mainly because from the side you can still see some of the green wreath.


Oct 18, 2011

Bathroom Tile Art

My husband's great-grandmother's house was being torn down.  Before the demo was complete I snagged what I could from inside that I thought I could craft into something.  There were some old bathroom tiles that were unbroken so I decided those would make perfect gifts for the grandkids once I fixed them up.  
Super easy project - just file down the back of the tile if rough so it will lie flat against the wall.  Then you can draw on the tile easily with a pencil, paint it with acrylic paint, then erase the pencil marks.  Then I just hot-glued some ribbon on the back for a hanger.
The flash reflection makes some of these difficult to see.


Chore Charts

My kids are now 7 and 9 and I still have baby food jars that I saved from when they were babies.  I am always trying to find new uses for them.  Well, I took 2 of the baby food jars and added some scrapbook paper to top to make them cute.  Then took a Ball Jar and did the same.  I filled the Ball jar with marbles.  Then for every item the girls mark off of their chore list they get to add a marble to their own baby food jar.  They can add up these points or cash them in on a daily basis, however they choose.  I made some chore charts and laminated them. I then hung the charts and a dry-erase marker from a clipboard in each of their rooms.  They can check off the chores as they do them.  Then at the end of the day we count up the check marks and transfer the marbles. Below are examples of the points system we use and the chore charts for each of my girls.


Jun 7, 2011

Soccer License Plate Contest

There is a contest for a license design for a new soccer plate for Indiana. I hope I am at least one of the three finalist.

Jun 3, 2011

Lake Rudolph t-shirt Design Contest


You didn't have to submit a drawing for the contest, just an idea. But, I figured a drawing might help my chances. Rudy turned out pretty cute for a pirate!

Jan 1, 2011

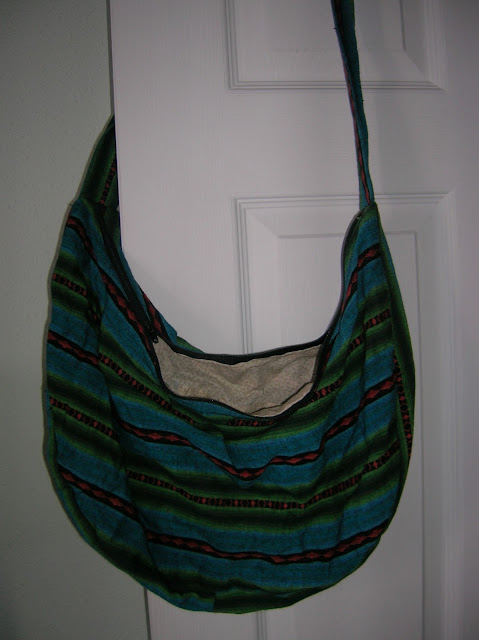
Bags (& 1 random pair of boxers)

Bags (& 1 random pair of boxers) I've made